Welcome to the Honeywell TH8320U1008 installation manual, designed to guide you through the setup of your advanced touch-screen programmable thermostat. This comprehensive resource ensures smooth installation and optimal performance.
1.1 Overview of the Thermostat and Its Features
The Honeywell TH8320U1008 is a touch-screen programmable thermostat designed for compatibility with various HVAC systems, including gas, oil, and electric heating/cooling systems. It features a high-resolution color display, 7-day programmable scheduling, and energy-saving capabilities. The thermostat supports up to 3 heat and 2 cool stages, ensuring precise temperature control. Its advanced features include remote access via Honeywell’s app, geofencing, and smart recovery, making it an efficient and user-friendly solution for home comfort.
1.2 Importance of Proper Installation
Proper installation of the Honeywell TH8320U1008 thermostat is crucial for optimal performance, energy efficiency, and safety. Incorrect installation can lead to malfunction, increased energy bills, or even system damage. Following the manual ensures compatibility with your HVAC system, maintains warranty validity, and guarantees reliable operation. Always adhere to the guidelines to avoid potential issues and ensure your system runs efficiently and safely.
System Compatibility and Requirements
The Honeywell TH8320U1008 is compatible with gas, oil, or electric heating systems and supports up to 3 Heat/2 Cool stages. Ensure your HVAC system matches these specifications for proper functionality and efficiency.
2.1 Compatible HVAC Systems
The Honeywell TH8320U1008 is designed for gas, oil, or electric heating systems, supporting up to 3 Heat/2 Cool stages. It is also compatible with heat pumps and dual-fuel systems. Ensure your HVAC system type matches these requirements for optimal performance. Proper system verification is essential before installation to guarantee compatibility and avoid operational issues.
2.2 Verifying System Type and Compatibility
Verify your HVAC system type by checking its heating and cooling stages. Ensure it matches the thermostat’s compatibility, which includes gas, oil, electric, heat pumps, and dual-fuel systems. Review the wiring diagram and confirm the number of heating/cooling stages your system supports. This step ensures proper installation and functionality of the Honeywell TH8320U1008 thermostat.
Pre-Installation Steps
Before installing the Honeywell TH8320U1008, gather all necessary tools and materials. Review the wiring diagram to ensure compatibility and prepare for a smooth installation process.
3.1 Gathering Necessary Tools and Materials
To ensure a smooth installation, gather the required tools and materials beforehand. These include a screwdriver, wire strippers, pliers, and a voltage tester. Additionally, have the thermostat unit, wallplate, and mounting screws ready. Refer to Honeywell’s official resources for a detailed checklist to avoid missing any essential items. Proper preparation is key to a successful installation process.
3.2 Understanding the Wiring Diagram
Understanding the wiring diagram is crucial for a successful installation. It provides a detailed layout of the thermostat’s terminal connections, ensuring correct wiring for your HVAC system. Identify terminals like R, W, Y, G, and C, and verify compatibility with your system type. Incorrect wiring can lead to system malfunctions, so carefully follow the diagram or consult a professional if unsure.
Installation Process
The installation involves removing the old thermostat, mounting the new device, and connecting wires according to the wiring diagram. Ensure proper alignment and secure fastening for optimal functionality.
4.1 Removing the Old Thermostat
Start by turning off the power to your HVAC system at the circuit breaker. Gently pull the old thermostat away from the wallplate to access the wires. Carefully disconnect the wires from their terminals, noting their positions for later reference. Remove any adhesive or screws holding the old thermostat in place. Set the old unit aside, ensuring wires remain intact for the new installation.
4.2 Mounting the New Thermostat
Ensure the area is clear and the power remains off. Align the new thermostat with the wallplate, ensuring it’s level. Secure it using the provided screws or adhesive backing. Position the thermostat about 5 feet above the floor in an area with good air circulation, avoiding drafts or obstructions. Verify it’s firmly attached before proceeding.
4.3 Connecting the Wires
Turn off the power to the HVAC system at the circuit breaker. Carefully connect the wires from your HVAC system to the corresponding terminals on the thermostat, ensuring labels (e.g., R, W, Y, G, C) match correctly. Secure the wires firmly to avoid loose connections. If unsure, consult the wiring diagram or contact a professional for assistance.
4.4 Finalizing the Installation
Restore power to the HVAC system and allow it to run through a full cycle; Ensure the thermostat display activates and functions correctly. Install the battery if required and verify all connections are secure. Test the system in both heating and cooling modes to confirm proper operation. Refer to the owner’s manual for final setup instructions and programming options.
Post-Installation Configuration
After installation, configure the thermostat by setting up the programmable schedule and adjusting comfort settings. This ensures optimal performance and energy efficiency tailored to your preferences.
5.1 Setting Up the Programmable Schedule
Setting up the programmable schedule allows you to customize temperature settings for different days and times. Access the menu, select the desired day(s), and choose from pre-set or custom options. Program the thermostat to adjust temperatures during awake, sleep, and away periods. Save your configuration to ensure energy-efficient operation. Regularly review and adjust the schedule to optimize comfort and energy savings.
5.2 Adjusting Comfort Settings
Adjusting comfort settings on the Honeywell TH8320U1008 allows for personalized temperature preferences. Navigate to the settings menu and customize options like temperature hold, geofencing, and smart alerts. Use the touchscreen to set energy-saving modes or specific comfort levels for different times of the day. Adjust temperature offsets for accurate readings and ensure optimal comfort and efficiency in your home.
Warranty Information
The Honeywell TH8320U1008 thermostat is backed by a comprehensive warranty. This section outlines the terms, coverage duration, and defects addressed, ensuring your device is protected and supported.
6.1 Terms and Conditions
The warranty for the Honeywell TH8320U1008 thermostat is valid for a specified duration, covering manufacturing defects under normal use. Proper installation and registered use are required. Terms exclude damage from misuse or unauthorized modifications, ensuring the product performs as intended when installed correctly. Refer to the manual for full details.
6.2 Claiming Warranty Service
To claim warranty service, contact Honeywell Customer Service with proof of purchase and a detailed description of the issue. Ensure the product was installed correctly and meets all terms. Representatives will guide you through the process, which may include repairs, replacements, or further diagnostics, ensuring your thermostat operates efficiently under warranty coverage.
Safety Precautions
Install the thermostat 5 ft above the floor in an area with good air circulation, avoiding drafts or extreme temperatures. Ensure proper installation to prevent malfunctions and ensure safe operation. Always follow the manual’s guidelines for a secure setup. Refer to the manual for compliance with safety regulations and standards.
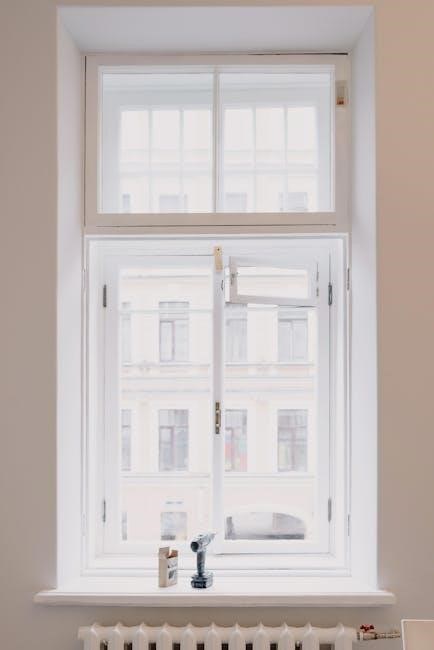
7.1 Ideal Installation Locations
The thermostat should be installed approximately 5 feet above the floor in an area with good air circulation, avoiding direct sunlight, drafts, or extreme temperatures. It should not be placed near doors, windows, or appliances that generate heat, as this could affect temperature accuracy. Ensure the location provides an average room temperature reading for optimal performance and safety.
7.2 Avoiding Common Mistakes
Avoid placing the thermostat near drafts, windows, or direct sunlight, as this can cause inaccurate temperature readings. Ensure proper wiring connections to prevent system malfunctions. Do not install the thermostat in areas with extreme temperatures or humidity. Always follow the manual’s guidelines for wiring and mounting to ensure safe and reliable operation of the Honeywell TH8320U1008 thermostat.
Troubleshooting Common Issues
Address common issues like chirping sounds, wiring problems, or display malfunctions. Check for loose connections, reset the thermostat, or consult the manual for specific solutions.
8.1 Resolving a Blank Screen
If the thermostat screen is blank, check the circuit breaker or power switch to ensure the system is powered on. Verify all wiring connections are secure and not loose. Reset the thermostat by removing it from the wallplate and waiting a few minutes before reinstalling. If the issue persists, consult the manual or contact Honeywell support for further assistance.
8.2 Addressing Temperature Offset
If your Honeywell TH8320U1008 thermostat has a temperature offset, adjust the offset setting to align the displayed temperature with the actual room temperature. This can be done through the thermostat’s menu by navigating to the comfort settings and selecting the offset option. After adjusting, test the system to ensure accuracy. If issues persist, consult the manual or contact Honeywell support.
Thermostat Features and Benefits
The Honeywell TH8320U1008 features a touch-screen interface, 7-day programmable scheduling, and energy-saving modes. It offers advanced comfort control, optimizing your home’s temperature for efficiency and consistency.
9.1 Energy-Saving Capabilities
The Honeywell TH8320U1008 offers advanced energy-saving features, including a 7-day programmable schedule and automatic changeover. Its smart recovery mode learns your system’s needs to minimize energy use, while energy-saving modes optimize heating and cooling for reduced utility bills and environmental impact.
9.2 Advanced Comfort Control Options
The Honeywell TH8320U1008 features a 7-day programmable schedule, allowing tailored temperature settings for energy efficiency. Its one-touch temporary override and precise temperature control ensure comfort. The thermostat supports up to 3 Heat/2 Cool stages, adapting to various HVAC systems for optimal performance and customizable comfort levels throughout the day.

Additional Resources and Support
Access the full user manual online for comprehensive instructions. Contact Honeywell customer service for assistance. Additional resources and guides are available for optimal thermostat operation.
10.1 Accessing the Full User Manual
To access the complete Honeywell TH8320U1008 user manual, visit the official Honeywell website or download it directly from trusted sources. The manual provides detailed instructions for installation, configuration, and troubleshooting, ensuring optimal use of your thermostat’s features like 7-day programming and energy-saving settings.
10.2 Contacting Honeywell Customer Service
For assistance with your Honeywell TH8320U1008 thermostat, contact Honeywell Customer Service via phone, email, or live chat. Visit their official website for support options, including troubleshooting guides and warranty inquiries. Representatives are available to address installation, configuration, or operational issues, ensuring your thermostat functions optimally.