Welcome to the Tasco Trail Camera Instruction Manual. This guide provides detailed setup, usage, and troubleshooting instructions to help you maximize your camera’s performance and enjoy wildlife monitoring.
Welcome to the Tasco Trail Camera Instruction Manual
Congratulations on purchasing the Tasco Trail Camera! This manual provides comprehensive guidance to help you set up, operate, and troubleshoot your camera. Designed for outdoor wildlife monitoring, it offers high-quality images, video recording, and weatherproof durability. Follow this guide to unlock its full potential and ensure optimal performance for capturing stunning moments in nature.
Overview of the Tasco Trail Camera
The Tasco Trail Camera is a rugged, weatherproof device designed for outdoor wildlife monitoring. It features a Passive Infra-Red (PIR) motion sensor, high-quality image and video capture, and long battery life. Built for durability, it is ideal for capturing animal activity in various environments, ensuring reliable performance in diverse conditions.
Importance of Reading the Manual
Reading this manual is essential to understand your Tasco Trail Camera’s features, proper setup, and troubleshooting. It ensures optimal performance, helps avoid common issues, and allows you to maximize the camera’s capabilities for wildlife monitoring. By following the guidelines, you can achieve the best results and enjoy a seamless user experience.
Key Features of the Tasco Trail Camera
The Tasco Trail Camera offers high-quality image and video capture, a passive infrared motion sensor, weatherproof design, and long battery life, making it ideal for outdoor wildlife monitoring.
High-Quality Image and Video Capture
The Tasco Trail Camera captures sharp 6MP or 8MP still images and clear 720p video clips, ensuring detailed wildlife observations. Its advanced sensor provides vibrant colors and excellent low-light performance, making it perfect for both day and night monitoring in various outdoor conditions.
Passive Infra-Red (PIR) Motion Sensor
The Tasco Trail Camera features a highly sensitive PIR motion sensor that detects animal movement efficiently. It triggers image or video capture upon detecting heat and motion, ensuring you never miss wildlife activity. Designed for optimal performance, it minimizes false triggers while maximizing battery life. Perfect for 24/7 monitoring in outdoor environments.
Weatherproof and Rugged Design
The Tasco Trail Camera is built with a weatherproof and rugged design, ensuring durability in harsh outdoor conditions. Its sealed casing protects internal components from rain, snow, and dust, while the sturdy construction withstands rough handling. This feature makes it ideal for long-term outdoor use, capturing wildlife activity reliably in any weather.
Long Battery Life
The Tasco Trail Camera is designed with an extra-long battery life, allowing extended outdoor monitoring without frequent replacements. It operates efficiently, ensuring reliable performance in the field. This feature enhances your wildlife surveillance experience, providing uninterrupted functionality for capturing images and videos over prolonged periods.
Unboxing and Inventory
Unboxing your Tasco Trail Camera is an exciting start to your wildlife monitoring journey. Carefully unpack and verify all included components, such as the camera, mounting strap, and user manual.
What’s Included in the Box
Your Tasco Trail Camera package includes the camera unit, a mounting strap for easy installation, a comprehensive user manual, and in some models, a USB cable for data transfer. Additional accessories like batteries or a memory card may be required, depending on the specific model purchased. Always verify the contents against the packing list provided.
Checking for Damage or Missing Parts
Upon opening the box, thoroughly inspect the camera and accessories for any visible damage or tampering. Ensure all items listed in the packing list are included. If any parts are missing or damaged, contact Tasco customer support immediately for assistance. This step ensures your trail camera is ready for proper setup and use.

Initial Setup and Configuration
Start by inserting batteries, setting the date and time, and formatting the memory card. These steps ensure proper camera functionality and prepare it for use.
Inserting Batteries
Open the battery compartment, located on the right side of the camera, by releasing the latches. Insert the recommended batteries, ensuring correct polarity. Close the compartment securely. Power on the camera to verify proper function. Always use high-quality batteries for optimal performance and longevity.
Setting the Date and Time
Access the camera’s menu by pressing the Menu button. Navigate to the Settings section and select Date and Time. Use the arrow keys to set the correct date and time format (). Ensure accuracy for proper time-stamping of images and videos. Save your settings to confirm. This ensures optimal camera performance and accurate data recording.
Formatting the Memory Card
Formatting the memory card ensures optimal performance and compatibility with your Tasco Trail Camera. Access the menu, navigate to the Settings or Maintenance section, and select Format. Confirm the action to erase all data on the card. Use a compatible SD or SDHC card for best results. Formatting prepares the card for storing new images and videos.
MOUNTING THE CAMERA
Properly mount your Tasco Trail Camera for optimal performance. Choose a location with clear visibility, ensuring the camera is level and securely fastened using the included strap or mounting bracket.
Choosing the Best Location
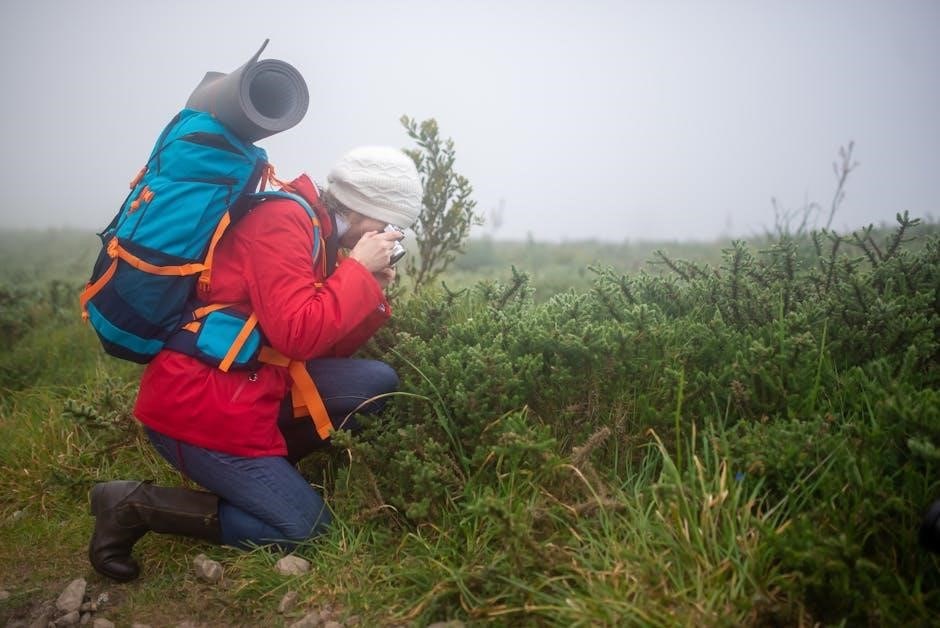
Select a spot with clear visibility of the area you want to monitor. Position the camera near animal trails or food sources for optimal wildlife detection. Ensure the camera faces north to avoid direct sunlight interference. Mount it at a height of 2-3 feet to align with animal movement. Avoid obstructing vegetation and ensure a clear line of sight for the PIR sensor. Consider sheltering it from harsh weather conditions while maintaining functionality. Test the location to ensure it captures the desired activity effectively.
Mounting Options
The Tasco Trail Camera can be mounted using the included adjustable strap or a compatible tripod. For tree mounting, use the strap to secure it tightly. Ensure the camera is level and stable for proper function. Avoid loose installations to prevent movement or vibration. Consider using additional mounting brackets for alternative surfaces or angles; Test the setup to ensure it holds the camera firmly in place.

UNDERSTANDING THE CAMERA MODES
The Tasco Trail Camera offers Still Image, Video, and Time-Lapse modes to capture wildlife activity. Each mode serves different purposes for effective monitoring and documentation.
Still Image Mode
The Still Image Mode captures high-quality photos (6MP or 8MP) when triggered by the PIR motion sensor. Ideal for detailed wildlife snapshots, this mode ensures crisp images, even at night, with low glow infrared technology. It’s perfect for monitoring specific animal activity without continuous recording, optimizing storage and battery life for efficient use.
Video Mode
The Video Mode captures 720p clips, typically 10 seconds long, when motion is detected. It’s ideal for observing animal behavior and movements. The camera’s PIR sensor ensures quick triggering, while the weatherproof design allows reliable outdoor use. This mode is perfect for detailed surveillance, providing valuable insights into wildlife activity patterns and habits in their natural habitat efficiently.
Time-Lapse Mode
Time-Lapse Mode allows you to capture images at set intervals, such as every 5 or 30 minutes, enabling long-term monitoring without continuous motion detection. This mode is ideal for observing seasonal changes, animal activity patterns, or vegetation growth over time. It helps conserve memory and battery life while providing valuable insights into environmental changes efficiently.
CONFIGURING ADVANCED SETTINGS
Configure advanced settings to optimize your camera’s performance, including sensitivity adjustments, detection intervals, and time-stamp enablement, ensuring tailored functionality for your specific surveillance needs.
Sensitivity Adjustment
Sensitivity adjustment fine-tunes the PIR motion sensor to detect movement accurately. Lower sensitivity reduces false triggers, while higher sensitivity captures more activity. Adjust based on environmental conditions and target monitoring needs for optimal performance and reliable image or video capture. Proper calibration ensures the camera responds effectively to desired movements without unnecessary activations.

Detection Interval
The detection interval determines the time between motion-triggered captures. Adjusting this setting allows you to customize how frequently the camera records images or videos after detecting movement. A shorter interval captures more events but may reduce battery life, while a longer interval conserves resources but might miss some activity.
Use the manual to set the interval that best fits your surveillance needs, balancing performance and efficiency for optimal results.
Time Stamp
The time stamp feature allows you to embed the date, time, and camera settings onto captured images and videos. This is useful for tracking wildlife activity patterns or monitoring property security. Enable the time stamp option in the settings menu to ensure all recordings are marked with accurate timestamps for precise documentation and record-keeping.

TROUBLESHOOTING COMMON ISSUES
Address common issues like false triggers, low battery life, or poor image quality with practical solutions and diagnostic steps to ensure optimal camera performance and reliability.
False Triggers
False triggers occur when non-target movements activate the camera. Ensure the PIR sensitivity is adjusted appropriately and clear the camera’s field of view from debris or small animals. Positioning the camera to avoid direct sunlight or extreme temperature changes can minimize false activations. Regularly check and clean the sensor for optimal performance.
Low Battery Life
Low battery life can occur due to high usage or incorrect battery installation. Use high-quality, alkaline batteries and ensure they are installed correctly. Adjusting the camera’s detection interval and sensitivity can conserve power. Avoid extreme temperatures and keep the camera away from direct sunlight to optimize battery performance and longevity.
Poor Image Quality
Poor image quality can result from incorrect camera placement, dirty lenses, or low light conditions. Ensure the camera is clean and free from obstructions. Adjust the sensitivity settings to reduce blur caused by motion. For clearer images, format the memory card regularly and avoid using low-quality cards. Properly align the camera angle for optimal results.
MAINTENANCE AND CARE
Regularly clean the camera lens and exterior with a soft cloth to prevent dirt buildup. Store the camera in a dry, cool place when not in use.
Cleaning the Camera
Use a soft, dry microfiber cloth to gently wipe the lens and exterior. Avoid harsh chemicals or abrasive materials. Regular cleaning ensures optimal image quality and prevents dirt buildup. For stubborn spots, lightly dampen the cloth with water, but avoid moisture inside the camera; Clean the lens periodically to maintain clarity and focus.
Storage and Handling
Store the camera in a cool, dry place away from direct sunlight and moisture. Avoid extreme temperatures and physical stress. Use a protective case when transporting. Handle the camera with care to prevent damage to the lens or sensors. Regularly inspect for wear and tear, ensuring all parts are secure before use.

FREQUENTLY ASKED QUESTIONS (FAQ)
Find answers to common questions about setup, troubleshooting, and optimal use of your Tasco Trail Camera. This section addresses frequently encountered issues and provides helpful tips.
General Usage
For optimal performance, place the camera in areas with high animal activity. Ensure the camera is level and facing the desired direction. Regularly check and replace batteries as needed. Use the provided settings to customize motion detection and image quality. Always format the memory card before initial use for proper function. Refer to the manual for troubleshooting common issues.
Troubleshooting
Common issues include false triggers, low battery life, and poor image quality. Check sensor sensitivity settings and ensure the surrounding area is clear of debris. Clean the camera lens regularly to maintain image clarity. Test batteries for proper function and replace as needed. Refer to the manual for detailed solutions to resolve these issues effectively.
DOWNLOADING AND USING SOFTWARE
Install the Tasco software to manage your trail camera settings and view images. Download the PDF manual for step-by-step installation guides and troubleshooting tips. Use the AI-powered chatbot for instant support and ensure optimal performance of your camera.
Installing the Software
Download the Tasco trail camera software from the official website or via the provided link in the manual. Follow the on-screen instructions to install the program on your computer. Ensure your device is connected to the camera for proper synchronization. Refer to the PDF manual for detailed installation steps and troubleshooting guidance. Use the AI-powered chatbot for additional support.
Uploading and Viewing Images
Connect your Tasco trail camera to a computer using a USB cable or insert the SD card into a card reader. Open the installed Tasco software, select the import option, and transfer images to your device. Organize and view photos or videos in the image gallery. Use the software tools to enhance or share your captures easily.

WARRANTY AND SUPPORT
Your Tasco Trail Camera is backed by a limited warranty covering defects in materials and workmanship. For support, contact Tasco’s customer service or visit their official website for assistance and warranty details.
Understanding Your Warranty
Your Tasco Trail Camera is protected by a limited warranty covering manufacturing defects in materials and workmanship. The warranty period varies by model and region. For valid claims, Tasco will repair or replace the defective unit. Refer to the warranty section in this manual for full terms, conditions, and registration requirements.
Contacting Customer Support
For assistance with your Tasco Trail Camera, contact our customer support team via email, phone, or through the official website. Visit the support page for troubleshooting guides and FAQs. Ensure to have your model number and purchase details ready for efficient service. Refer to the manual for contact information and support options.
Congratulations! You’ve successfully set up and learned to use your Tasco Trail Camera. Enjoy capturing wildlife moments with its advanced features and durable design.
Final Tips for Optimal Use
Position your camera strategically for optimal wildlife coverage. Regularly clean the lens and sensor for clear images. Ensure batteries are fully charged and use a high-quality memory card. Secure the camera tightly to prevent theft or tampering. Refer to the manual for troubleshooting common issues and explore advanced settings for personalized use.
Enjoy Your Tasco Trail Camera
Congratulations! Your Tasco Trail Camera is now ready to capture stunning wildlife moments. With its rugged design and advanced features, it’s perfect for outdoor exploration. Use it to monitor wildlife, secure your property, or simply enjoy nature. Explore its capabilities, and happy scouting with your reliable Tasco Trail Camera!