This manual provides a comprehensive guide for installing the Honeywell T3 thermostat, ensuring safe and efficient setup for optimal heating and cooling system performance.
1.1 Overview of the Honeywell T3 Thermostat
The Honeywell T3 is a programmable thermostat designed for efficient heating and cooling system control. It features a modern, user-friendly interface with a clear backlit display. Compatible with gas boilers, heat pumps, and zone valves, it offers smart home integration and energy-saving modes. The T3 ensures precise temperature control, making it ideal for homeowners seeking convenience and comfort.
1.2 Importance of Proper Installation
Proper installation of the Honeywell T3 thermostat ensures safe and efficient operation. It prevents electrical hazards and guarantees optimal performance. Correct wiring and setup are crucial for accurate temperature control and smart features functionality. Improper installation can lead to system malfunctions or safety risks. Following the manual ensures compatibility with your heating system and maintains warranty validity, providing long-term reliability and energy efficiency for your home.

Pre-Installation Requirements
Ensure compatibility with your heating system and verify power requirements. Gather necessary tools and materials, and switch off mains power before starting the installation process.
2.1 Compatibility Check
Verify that the Honeywell T3 is compatible with your heating system, including gas, oil, electric, and OpenTherm boilers. Ensure the thermostat supports your system’s voltage and wiring configuration. Check for compatibility with zone valves and smart home systems like Amazon Alexa and Google Assistant for enhanced functionality. Confirm system type and voltage requirements before proceeding with installation to avoid any issues;
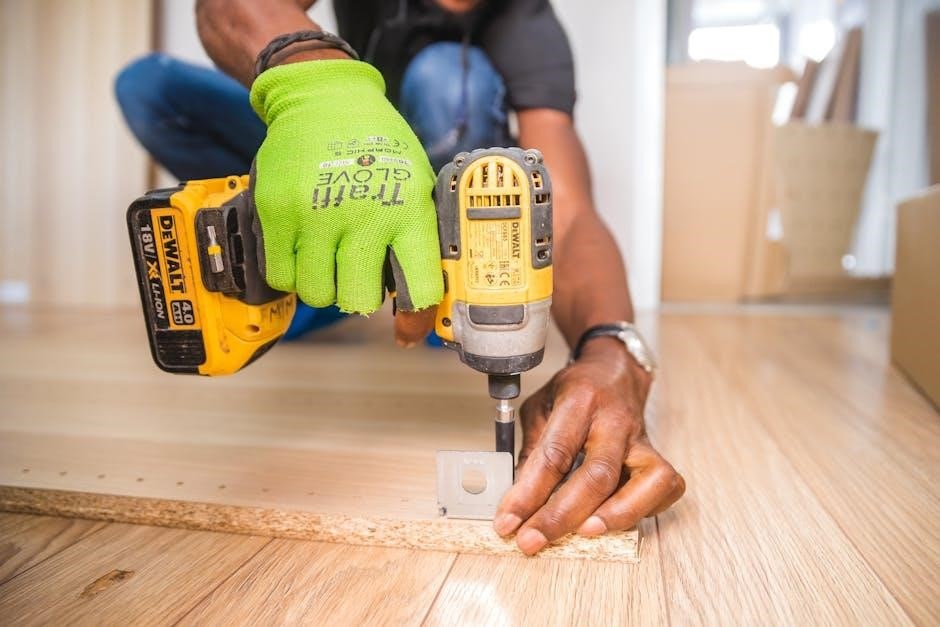
2.2 Tools and Materials Needed
The installation requires basic tools like a screwdriver, wire strippers, and a drill. Materials include screws, wall anchors, and a decorative cover plate. Ensure you have a 2-wire cable for the receiver box (if applicable). Always switch off mains power before starting. Refer to the package for included items and verify all components are present before proceeding with the installation process.

Installation Process
The Honeywell T3 installation involves mounting the wall plate, connecting wires, and installing the thermostat unit. Follow the step-by-step guide for a safe and efficient setup.
3.1 Mounting the Wall Plate
Mount the wall plate by removing the front cover and attaching the backplate to the wall using screws and anchors. Ensure it is level and securely fastened.
Place the wall plate in a location away from direct sunlight and heat sources, maintaining a height of at least 1.2 to 1.5 meters above the floor for accurate temperature readings.
Connect the wires to the terminal block according to the wiring diagram, then attach the thermostat unit to the wall plate, ensuring a snug and proper fit.
3.2 Connecting the Wires
Before connecting the wires, ensure the power is turned off at the breaker box to avoid electrical hazards.
Refer to the wiring diagram provided in the manual to correctly identify and match the terminals on the wall plate with the thermostat unit.
Securely connect the wires to the appropriate terminals, tightening the screws firmly to ensure reliable connections. Avoid any short circuits or loose wiring.
Double-check all connections to confirm they align with the system requirements before proceeding with the installation.
3.3 Installing the Thermostat Unit
Mount the backplate securely to the wall using the provided screws and anchors, ensuring it is level and evenly aligned.
Attach the front cover to the backplate by aligning the clips and gently snapping it into place until it clicks firmly.
Insert the batteries into the thermostat unit, ensuring they are correctly oriented to match the polarity indicators.
Fully seat the thermostat onto the wall plate, making sure it fits snugly and all connections are secure.
Verify that the thermostat is properly aligned and functioning correctly before finalizing the installation.
Wiring Configuration
Ensure correct wire connections for compatibility with heating systems, including gas, oil, and electric setups. Follow diagrams for proper terminal assignments and verify system compatibility.
4.1 Understanding the Terminal Connections
The Honeywell T3 thermostat features clearly labeled terminal connections for compatibility with various heating systems. Ensure proper wiring for 230V on/off appliances, OpenTherm boilers, or zone valves. The terminal block supports wires up to 1.5 mm, with secure connections essential for reliable operation. Refer to the wiring diagram for specific assignments to avoid installation errors and ensure system compatibility.
4.2 Configuring for Heating and Cooling Systems
The Honeywell T3 supports both heating and cooling systems, offering automatic control to maintain desired temperatures. It is compatible with gas boilers, heat pumps, and combi boilers. For cooling systems, ensure proper wiring and configuration. The thermostat can automatically switch between heating and cooling modes based on the set temperature. Use the installer menu to customize settings for optimal performance and energy efficiency.

Post-Installation Setup
After installation, insert batteries, check power status, and set the date/time. Ensure compatibility with your heating/cooling system and configure basic settings for smooth operation.
5.1 Programming the Thermostat
After installation, set the date, time, and temperature preferences. Choose from 7-day, 52-week, or custom schedules. Enable automatic daylight saving adjustments and set temperature limits. Use the keypad to program up to four daily setpoints, ensuring energy efficiency. Optionally, activate energy-saving modes or remote control features for enhanced convenience and smart home integration.
5.2 Setting Up Smart Features
Connect your Honeywell T3 thermostat to smart home systems like Amazon Alexa or Google Assistant for voice control. Enable remote access via the app to adjust settings from anywhere. Ensure a stable internet connection and follow the app’s pairing instructions. For wireless models like the T3R, binding the receiver box to the thermostat is essential. This setup allows advanced features like geofencing and energy usage tracking, enhancing convenience and efficiency.

Troubleshooting Common Issues
Address common issues like blank displays or low battery alerts by checking power sources and wiring connections. Ensure proper installation and consult the manual for specific solutions.
6.1 Resolving Power Issues
If the thermostat display is blank, check if it is powered on. For wired models (T3 and T3M), ensure the mains power supply is connected. For T3R wireless models, verify the receiver box has power. If using batteries (T3 only), replace them if low. Reset the system by turning power off and on again. Consult the manual for detailed troubleshooting steps to restore functionality.
6.2 Addressing Wiring Problems
Ensure all wires are securely connected to the correct terminals as per the wiring diagram. Check for loose connections or incorrect wire assignments. For T3 and T3M models, verify the mains power supply is correctly wired. For T3R wireless models, ensure the receiver box is properly connected to the boiler. If issues persist, consult the troubleshooting section or contact a professional for assistance.
Maintenance and Upkeep
Regularly clean the thermostat display and check for firmware updates to ensure optimal performance. Inspect wiring connections to maintain system integrity and reliability over time.
7.1 Cleaning the Thermostat
Regular cleaning ensures optimal performance. Use a soft, dry cloth to gently wipe the display and remove dust. Avoid harsh chemicals or moisture, as they may damage the unit. Clean the thermostat casing with a mild detergent solution, ensuring no liquid enters the device. Regular maintenance helps preserve functionality and extends the lifespan of your Honeywell T3 thermostat.
7.2 Updating Software
Regular software updates ensure your Honeywell T3 thermostat operates with the latest features and improvements. To update, navigate to the settings menu and select “Software Update.” The thermostat will automatically check for updates and guide you through the installation process. Ensure the device remains powered on during the update to avoid interruptions. Updated software enhances performance, security, and compatibility with smart home systems, providing a seamless user experience. Always verify the update source for authenticity to maintain system integrity and functionality. Regular updates are crucial for optimal performance and to access new features as they become available, ensuring your thermostat remains efficient and secure. By keeping the software up-to-date, you can enjoy improved functionality and enhanced user experience. This simple process helps maintain the longevity and effectiveness of your Honeywell T3 thermostat, ensuring it continues to meet your heating and cooling needs effectively. Updates may include bug fixes, feature enhancements, and compatibility improvements, making it essential to perform them regularly for uninterrupted service. The update process is designed to be user-friendly, allowing you to stay current with the latest advancements in thermostat technology without requiring technical expertise. This ensures your system remains modern, efficient, and fully integrated with your smart home setup, providing you with consistent comfort and control. By prioritizing software updates, you can maximize the potential of your Honeywell T3 thermostat and enjoy a hassle-free experience. The importance of regular updates cannot be overstated, as they are vital for maintaining peak performance and ensuring your thermostat continues to function as intended. Stay connected and up-to-date with the latest software to get the most out of your Honeywell T3 thermostat. This proactive approach to maintenance will help prevent issues and ensure your system operates smoothly for years to come.
Advanced Features
The Honeywell T3 offers smart home integration, voice control via Alexa and Google Assistant, and energy-saving modes, enhancing comfort and efficiency with modern, user-friendly technology.
8.1 Smart Home Integration
The Honeywell T3 seamlessly integrates with smart home systems like Amazon Alexa and Google Assistant, allowing voice control and remote adjustments. This feature ensures users can manage their heating and cooling systems effortlessly, enhancing convenience and energy efficiency. Compatibility with these platforms makes the T3 a versatile and modern addition to any smart home setup, improving overall comfort.
8.2 Energy-Saving Modes
The Honeywell T3 offers advanced energy-saving modes, including automatic scheduling and geofencing, which adjust temperatures based on your daily routine and location. Smart recovery mode optimizes heating and cooling, while the eco-mode ensures efficient energy use. These features help reduce energy consumption without compromising comfort, making the T3 an eco-friendly and cost-effective solution for modern homes.

Safety Precautions
Always turn off power at the breaker before installation. Avoid electrical hazards and ensure proper wiring to prevent shocks. Keep the thermostat away from direct sunlight and heat sources for accurate performance.
9.1 Working with Electrical Systems
Ensure mains power is switched off before accessing wiring; Use appropriate tools and follow safety guidelines to avoid electrical shocks. Verify compatibility with your system’s voltage requirements. Keep wires organized and secure to prevent short circuits. Never attempt installations near water or in damp conditions. Always refer to local electrical codes and manufacturer instructions for compliance and safety. Proper grounding is essential for safe operation.
9.2 Avoiding Common Hazards
Always switch off mains power before handling wiring to prevent electrical shocks. Avoid installing near heat sources, direct sunlight, or drafts. Keep the thermostat away from water and moisture to prevent damage. Never touch electrical components with wet hands. Follow manufacturer guidelines and local codes to ensure safe installation. Proper placement and wiring are crucial to avoid hazards and ensure reliable performance.
Warranty and Support
The Honeywell T3 thermostat is backed by a comprehensive warranty, ensuring coverage for parts and labor. For support, visit Honeywell’s official website or contact their customer service team for assistance with installation, troubleshooting, or warranty claims. Additional resources include online manuals, FAQs, and dedicated support hotlines to address any user concerns promptly and effectively.
10.1 Understanding the Warranty Terms
The Honeywell T3 thermostat is covered by a 2-year limited warranty, protecting against defects in materials and workmanship. The warranty includes parts and labor for repairs or replacements. Registration is recommended to ensure full coverage. Damage due to misuse, improper installation, or external factors is excluded. For warranty claims, contact Honeywell’s customer support team or visit their official website for detailed instructions and eligibility criteria.
10.2 Contacting Customer Support
For assistance with the Honeywell T3 thermostat, customers can contact Honeywell’s support team via phone, email, or through the official website. Online resources, including FAQs and troubleshooting guides, are also available. Support is accessible 24/7 for technical inquiries, warranty claims, or general product guidance, ensuring prompt resolution of any issues related to installation or operation.
Completing the Honeywell T3 installation ensures efficient temperature control and smart home integration, offering ease of use and energy savings for enhanced comfort now.
11.1 Final Checks
After installation, ensure all wires are securely connected, the thermostat is level, and power is restored. Test basic functions like temperature adjustment and smart features. Verify the display is clear, the backlight functions, and all scheduled settings are active. Confirm smart home integration works seamlessly. Double-check the thermostat’s placement, avoiding direct sunlight or heat sources. Ensure the device is updated with the latest software for optimal performance and energy efficiency.
11.2 Enjoying Your Hive Thermostat
With the Honeywell T3 installed, you can now enjoy seamless control over your heating and cooling systems. The thermostat integrates effortlessly with smart home systems, allowing voice commands and remote adjustments via the Hive app. Its intuitive interface and energy-saving modes ensure comfort and efficiency. The large backlit display and simple programming make it user-friendly, while its modern design complements any home decor, enhancing your living experience.