Fellow pour-over brewing offers a manual, precise method for coffee enthusiasts. By using fresh beans and controlled techniques, it ensures optimal flavor extraction, making every sip a delightful ritual.
1.1 Understanding the Basics of Pour-Over Brewing
Pour-over brewing is a manual method that involves slowly pouring hot water over ground coffee beans in a filter. It requires precision in water temperature, coffee-to-water ratio, and pouring technique. This process allows for full control over extraction, resulting in a clean and flavorful cup. Freshly ground beans and proper equipment are essential for achieving the best results.
1.2 Overview of Fellow Products for Pour-Over
Fellow offers a range of products designed to elevate pour-over brewing, including the Stagg EKG Electric Kettle for precise temperature control and the Stagg Dripper for consistent extraction. Their products are crafted with durability and aesthetics in mind, providing brewers with tools that simplify the process while enhancing the overall coffee experience.
Equipment Needed for Fellow Pour-Over
The essential gear includes a Fellow Stagg EKG kettle, dripper, filters, a scale, freshly ground coffee beans, a grinder, and filtered water for optimal brewing results;
2.1 Fellow Stagg EKG Electric Pour-Over Kettle
The Fellow Stagg EKG is an electric kettle designed for precise pour-over brewing. It features temperature control (195°F-205°F), a gooseneck spout for controlled pouring, and a built-in thermometer. Its sleek, modern design includes a keep-warm function, making it ideal for consistent brewing. The insulated, stainless steel body ensures durability and heat retention, perfect for home or professional use.
2.2 Fellow Dripper and Filters
The Fellow Dripper is a double-walled, column-style pour-over dripper designed for consistent heat retention. It comes with ratio aids (dot markers) to guide accurate coffee-to-water ratios. Compatible with standard paper filters, it ensures balanced extraction and a clean cup. The dripper’s design allows for smooth water flow, enhancing the brewing experience and resulting in a flavorful finish every time;
2.3 Additional Tools and Materials
Beyond the essentials, a scale ensures precise coffee measurement, while a grinder guarantees freshly ground beans. A carafe or cup is needed to collect the brewed coffee, and a timer helps monitor brewing duration. Optional accessories like a funnel can streamline the process, enhancing efficiency and consistency for a perfect pour-over experience every time.
Preparing Your Equipment
Start by rinsing the filter and preheating the dripper. Heat water to the ideal temperature using the Fellow Stagg EKG kettle, ensuring it’s between 195°F-205°F for optimal brewing conditions.
3.1 Rinsing the Filter and Preheating the Dripper
Place the paper filter in the Fellow dripper and rinse thoroughly with hot water to remove any paper dust. Discard the water, then preheat the dripper to ensure even extraction. This step is crucial for maintaining consistent temperature and preventing unwanted flavors from affecting your brew. Preheating ensures your equipment is ready for the perfect pour-over experience.
3.2 Heating Water to the Ideal Temperature
Use the Fellow Stagg EKG kettle to heat water to between 195°F and 205°F, ideal for pour-over brewing. Ensure water is fresh and filtered for the best flavor. Preheat the kettle and let it cool slightly before pouring to prevent overheating, which can burn the coffee grounds and ruin the extraction. Proper temperature is key for a balanced brew.
3.3 Measuring Coffee Grounds
Measure coffee grounds accurately using a scale for consistency. For a single serving, use about 40 grams, adjusting as needed. Freshly grind beans to a medium-coarse texture to ensure optimal extraction. Use the ratio aids on the Stagg Dripper to guide your measurements, ensuring the perfect coffee-to-water balance for a flavorful brew every time.
The Brewing Process
The brewing process involves blooming the coffee, an initial pour, subsequent pours, and completion. Each step ensures even extraction and balanced flavor.
4.1 Blooming the Coffee
Blooming initiates extraction by releasing CO2. Pour 40g of water over ground coffee, saturating all grounds. Allow 30-45 seconds for the bloom phase, ensuring optimal flavor release. This step is crucial for achieving a balanced cup and preventing under-extraction. Proper blooming enhances the coffee’s aroma and taste, setting the foundation for a perfect pour-over.
4.2 Initial Pour and Saturation
After blooming, pour water evenly in concentric circles, starting from the center outward. Aim to saturate all grounds, reaching a total of 150g. This ensures uniform extraction and prevents channeling, promoting a balanced flavor. Maintain a steady flow to evenly distribute water, ensuring all coffee is fully immersed for optimal extraction during the brewing process.
4.3 Subsequent Pours and Timing
Following the bloom, pour water in two to three phases, each time evenly saturating the grounds. After the first pour reaches 150g, wait for the water to drain slightly before adding more. Continue pouring until you reach 350g, ensuring each phase is timed to maintain a total brew time of 3-4 minutes for a balanced extraction.
4.4 Final Pour and Completion
After the final pour reaches 350g, allow the coffee to drip completely. Remove the filter, and your pour-over is ready. Pour the coffee into your cup or carafe immediately to prevent over-extraction. The total brew time should be around 3-4 minutes, ensuring a balanced and flavorful cup. Serve and enjoy your perfectly brewed coffee.
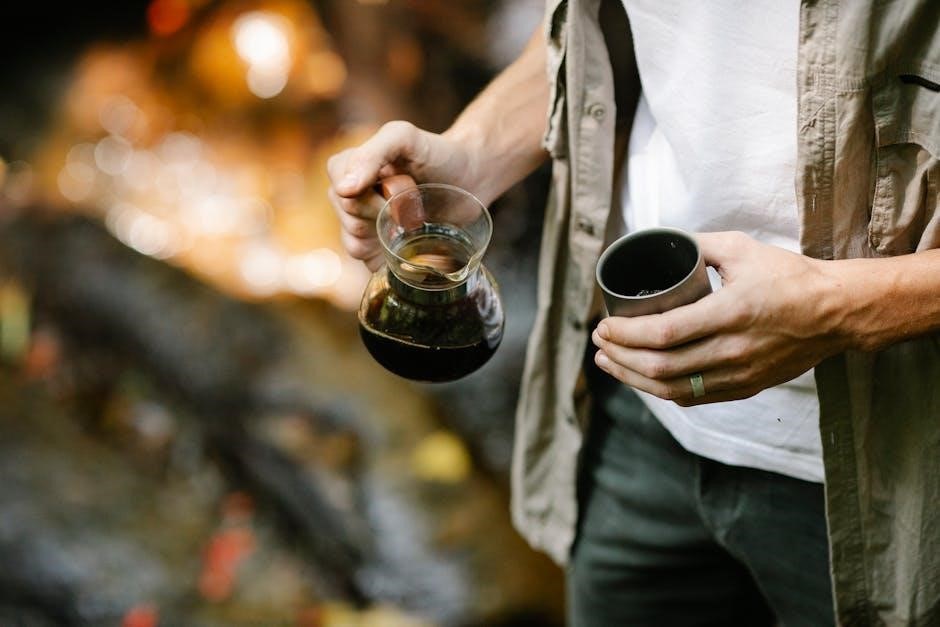
Serving Your Pour-Over Coffee
Transfer the freshly brewed coffee to your cup or carafe, ensuring a balanced flavor. Serve immediately and enjoy the aroma, then clean up your equipment for the next brew.
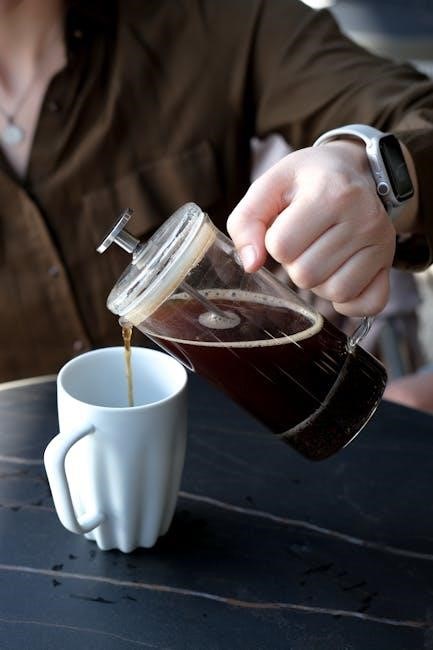
5.1 Transferring the Coffee to a Cup or Carafe
Once brewing is complete, carefully pour the coffee from the dripper into your cup or carafe. Ensure the transfer is smooth to maintain the coffee’s temperature and flavor profile. Handle the equipment with care to avoid spills and enjoy the perfectly balanced brew immediately after transferring.
5.2 Cleaning Up After Brewing
After brewing, discard the used filter and coffee grounds. Rinse the dripper and kettle with warm water to remove any residue. Regular cleaning prevents buildup and ensures optimal performance. Dry the equipment thoroughly to avoid any water spots or mineral deposits, maintaining your Fellow pour-over tools in pristine condition for future brews.
Tips for the Perfect Cup
- Adjust the coffee-to-water ratio for balanced flavor.
- Monitor water temperature between 195°F-205°F.
- Grind beans to a medium consistency for optimal extraction.
- Time the bloom and pouring phases accurately.
6.1 Adjusting Coffee-to-Water Ratio
The ideal ratio for pour-over is 1:15 to 1:17 coffee to water. Adjusting this balance tailors strength and flavor to your preference, ensuring a perfect cup every time. Use Fellow’s ratio aids for guidance, experimenting to find your ideal brew. Consistency is key to achieving a well-balanced and satisfying cup of coffee.
6.2 Grinding Your Beans to the Right Consistency
Freshly grinding beans ensures optimal flavor. Aim for a medium-coarse grind, similar to kosher salt, for pour-over brewing. Adjust your grinder to match the Fellow Stagg Dripper’s needs, ensuring even extraction; Proper grind size prevents under or over-extraction, leading to a balanced and delicious cup of coffee every time. Consistency is crucial for the best results.
6.3 Monitoring Water Temperature
Water temperature is crucial for pour-over brewing. Use the Fellow Stagg EKG kettle to heat water between 195°F and 205°F. Aim for 204°F as suggested for optimal extraction. Avoid boiling water, as it can burn the beans, and ensure the temperature stabilizes before pouring over the grounds to achieve a perfectly balanced cup of coffee consistently.
6.4 Timing the Bloom and Pouring Phases
Timing is essential for a perfect pour-over. Start by blooming the coffee for 30 seconds to release CO2. Then, pour in concentric circles, saturating all grounds evenly. Allow the coffee to drain between pours, aiming for a total brew time of 3-4 minutes. Adjust your pouring speed to maintain consistent extraction and flavor balance throughout the process.
Common Mistakes to Avoid
Avoid rushing the brewing process, as it can lead to under-extraction. Ensure water temperature stays between 195°F-205°F for optimal flavor. Inconsistent grind sizes and over-saturating grounds can disrupt even extraction, resulting in a less balanced cup.
7.1 Rushing the Brewing Process
Rushing the brewing process can lead to under-extraction and a weaker, less flavorful cup. Allow the coffee to bloom properly and complete each pour phase without speeding through the steps. Aim for a total brew time of 3-4 minutes to ensure all flavors are evenly extracted. Patience is key to achieving a balanced and satisfying pour-over coffee.
7.2 Using Incorrect Water Temperature
Using water that’s too hot or too cold can negatively impact extraction. Aim for a temperature between 195°F and 205°F, as this range ensures optimal flavor release. Water that’s too hot can burn the coffee, while water that’s too cold results in under-extraction. Use tools like the Fellow Stagg EKG kettle for precise temperature control to achieve the perfect pour-over every time.
7.3 Inconsistent Grind Size
Inconsistent grind size disrupts even extraction, leading to under- or over-extracted coffee. Use a burr grinder for uniform particles and opt for a medium-coarse grind. Adjust the grind based on the bean type and roast level to ensure balanced flavor in your pour-over. Freshly grinding ensures optimal results and prevents stale flavors from affecting your brew.
Maintenance and Care
Regularly clean the dripper and kettle with mild soap to prevent residue buildup. Descale the electric kettle periodically to maintain water flow and temperature accuracy. Always use fresh, filtered water for optimal taste and equipment longevity.
8.1 Cleaning the Dripper and Kettle
Regular cleaning ensures optimal performance and hygiene. Rinse the dripper with warm water after each use, and occasionally use mild soap. For the kettle, descale every 3-6 months using a descaling solution or vinegar. Avoid abrasive materials to prevent scratching. Dry thoroughly after cleaning to prevent water spots and mineral buildup, ensuring longevity and consistent brewing results.
8.2 Descaling the Electric Kettle
Descaling your Fellow electric kettle is essential for maintaining performance and preventing mineral buildup. Mix equal parts water and white vinegar in the kettle. Heat the solution to 200°F, then let it sit for 30 minutes. Rinse thoroughly with fresh water and repeat if necessary. This process ensures optimal temperature control and water flow for precise pour-over brewing.