This manual provides a comprehensive guide for Singer Touch and Sew models‚ offering detailed instructions for threading‚ maintenance‚ and troubleshooting to enhance your sewing experience.
Overview of the Singer Touch and Sew Series
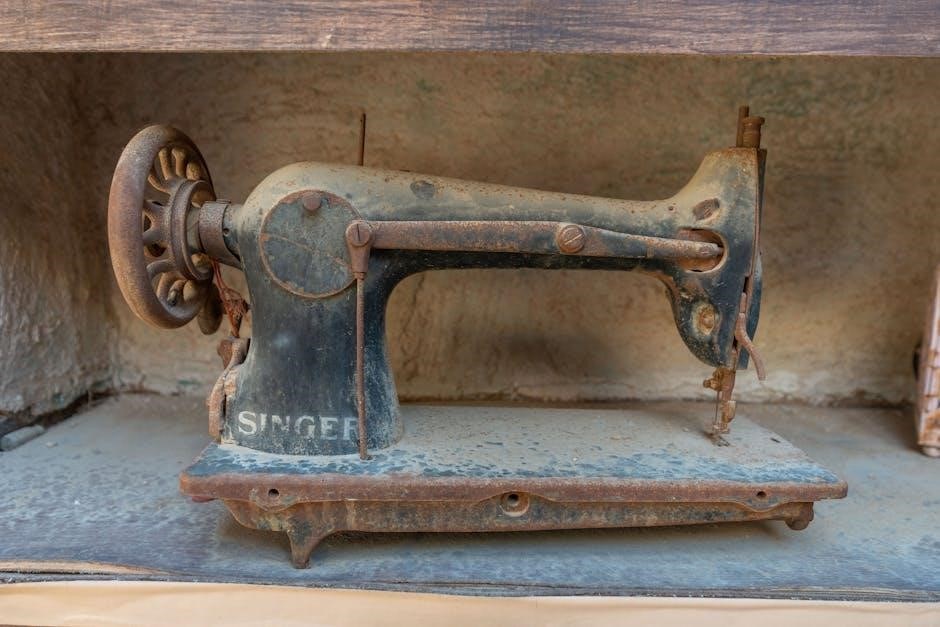
The Singer Touch and Sew series is a popular line of sewing machines known for their versatility and user-friendly design. These machines cater to both beginners and experienced sewists‚ offering a range of features such as adjustable stitch patterns‚ automatic needle threading‚ and customizable settings. Models like the Singer 600‚ 603‚ 640‚ and 700 series are widely recognized for their durability and ease of use. The series includes both mechanical and electronic models‚ providing options for different sewing needs. With a focus on simplicity and efficiency‚ the Singer Touch and Sew machines are ideal for crafting‚ quilting‚ and everyday sewing projects. Their robust construction and intuitive controls make them a favorite among sewing enthusiasts.
Importance of the Manual for Users
The Singer Touch and Sew manual is an essential resource for users‚ providing detailed guidance on machine operation‚ maintenance‚ and troubleshooting. It helps users unlock the full potential of their sewing machine by explaining features like stitch pattern selection‚ thread tension adjustment‚ and bobbin management. The manual also includes safety precautions and step-by-step instructions for setup and usage‚ ensuring a smooth and safe sewing experience. Whether you’re a novice or an experienced sewer‚ the manual serves as a valuable reference‚ helping to prevent common errors and extend the machine’s lifespan. Regularly consulting the manual allows users to maintain their machine effectively and explore advanced functions confidently.
Models Covered in the Manual
The Singer Touch and Sew manual covers a wide range of models‚ including the 700 Series‚ 7466‚ 603‚ 648‚ 640‚ and others. These models vary in features‚ from basic to advanced sewing capabilities‚ but all share core functions explained in the manual. The guide provides specific instructions for each model‚ ensuring users can optimize their machine’s performance. Whether you own the Singer Classic Touch & Sew 700 or the Golden Touch & Sew 640‚ the manual offers tailored guidance. Digital versions of the manual are also available for models like the 7466‚ making it easier for users to access the information they need. This comprehensive coverage ensures that all Singer Touch and Sew users can benefit from detailed instructions and troubleshooting tips.

Safety Precautions and Guidelines
Always keep fingers away from moving parts and use proper needle plates. Special care is required when children are near the machine to ensure safe operation.
General Safety Tips for Sewing Machines
To ensure safe operation of your Singer Touch and Sew machine‚ always keep fingers away from moving parts and avoid using the machine as a toy. Special care is required when children are nearby‚ as they may accidentally touch sharp components or operating elements. Never leave the machine unattended while it is in use‚ and ensure the work area is clear of clutter to prevent accidents. Proper handling and maintenance‚ as outlined in the manual‚ are essential for safe and effective sewing. Always follow the manufacturer’s guidelines to minimize risks and enjoy a secure sewing experience. Regularly inspect the machine for any damage or wear‚ and address issues promptly to maintain safety standards.
- Keep fingers away from the needle and moving parts.
- Supervise children when the machine is in use.
- Ensure the workspace is clean and well-lit.
- Avoid using damaged or worn-out accessories.
Handling Needles and Sharp Parts
Always handle needles and sharp parts with extreme care to avoid injuries. Keep fingers away from the needle and other moving components‚ especially during operation. Use Singer-branded needles‚ as they are designed for compatibility and safety. Never touch the needle or presser foot with bare hands‚ and avoid sewing when tired or distracted. Store needles and sharp accessories in a safe place‚ out of children’s reach. Regularly inspect needles for damage or wear and replace them immediately if needed. Proper handling ensures safe and efficient sewing‚ minimizing risks of accidents. Always follow the manual’s guidelines for needle installation and replacement to maintain optimal performance and user safety.
- Use Singer-branded needles for compatibility and safety.
- Inspect needles regularly for damage or wear.
- Store sharp parts securely to prevent accidents.
- Avoid touching the needle or presser foot with bare hands.
Emergency Procedures
In case of an emergency‚ immediately turn off the sewing machine and unplug it from the power source. Never attempt to remove fabric or accessories while the machine is operational; If the needle breaks or thread snaps‚ switch off the power and carefully remove the broken parts. Keep children away from the machine during operation and ensure they understand it is not a toy. In case of accidental needle pricks‚ apply first aid promptly. Regularly inspect the machine for worn or damaged parts to prevent malfunctions. Always follow the manual’s safety guidelines to minimize risks and ensure a safe sewing environment. Proper emergency procedures ensure user safety and prolong machine longevity.
- Turn off and unplug the machine immediately in an emergency.
- Do not attempt to remove fabric while the machine is running.
- Inspect for damaged parts regularly to prevent accidents.
- Keep children away during operation.
Understanding Your Singer Touch and Sew Machine
This section introduces the key components and features of the Singer Touch and Sew machine‚ helping users familiarize themselves with its operation and capabilities for optimal use.
Principal Parts of the Machine
The Singer Touch and Sew machine features essential components designed for efficient sewing. The stitch pattern dial allows users to select various stitch options‚ while the bobbin holds the lower thread. The presser foot ensures fabric stays in place‚ and the spool pins manage thread placement. Understanding these parts is crucial for proper operation and maintenance‚ enabling users to troubleshoot and optimize their sewing experience effectively.
The Presser Foot and Its Functions
The presser foot is a vital component of the Singer Touch and Sew machine‚ designed to hold fabric firmly in place during sewing. It ensures even feeding and prevents fabric slipping‚ allowing for consistent stitch formation. The presser foot can be raised or lowered using the presser foot lifter‚ enabling easy fabric insertion and removal. Different presser feet‚ such as the zigzag foot or straight stitch foot‚ are available for specific tasks‚ enhancing versatility. Proper use of the presser foot is essential for achieving professional-looking results and maintaining control over fabric movement during sewing operations.
The Bobbin and Its Role
The bobbin plays a crucial role in the Singer Touch and Sew machine by holding the lower thread‚ which interacts with the upper thread to create stitches. Properly inserting the bobbin into the bobbin case ensures smooth stitching and prevents thread tangling. The bobbin should be wound with the correct amount of thread and aligned with the machine’s tension settings. Using the correct size and type of bobbin for your machine is essential for optimal performance. The bobbin’s role is vital for maintaining consistent stitch quality and preventing common issues like thread breakage or uneven tension. Always refer to the manual for specific guidance on bobbin installation and winding for your Singer Touch and Sew model.

Threading Your Singer Touch and Sew Machine
Threading your Singer Touch and Sew machine involves placing the thread on the spool pin‚ guiding it through the tension discs and take-up lever‚ and finally threading the needle. Ensure the take-up lever is raised by turning the handwheel to facilitate smooth thread passage. Use the correct thread type for your fabric‚ as recommended in the manual. Proper threading is essential for consistent stitch quality and to prevent issues like thread breakage or uneven tension. Always refer to the manual for specific guidance and troubleshooting tips to achieve optimal results.
Step-by-Step Threading Guide
To thread your Singer Touch and Sew machine‚ start by placing the thread on the spool pin. Gently pull the thread to remove any tangles and guide it through the tension discs. Next‚ loop the thread around the take-up lever‚ ensuring it sits properly in the designated groove. Then‚ bring the thread down to the needle‚ leaving a small loop for easy needle threading. Insert the thread through the needle eye from front to back. Finally‚ pull the thread gently to secure it and test by sewing a straight line to ensure proper tension. Always refer to the manual for model-specific threading instructions and troubleshooting tips to avoid common issues like thread breakage or uneven stitching.
Troubleshooting Thread Issues
Common thread issues on the Singer Touch and Sew machine include thread breakage‚ uneven stitching‚ or improper tension. If the thread breaks frequently‚ check for tangles or knots in the spool. Ensure the thread is properly seated in the tension discs and the take-up lever is in the correct position. For uneven stitches‚ verify that the bobbin is correctly threaded and seated. Tension problems can often be resolved by adjusting the upper thread tension dial or cleaning lint from the machine. If issues persist‚ consult the manual for specific troubleshooting steps or consider using Singer-branded threads and needles for optimal performance. Regular maintenance and proper threading techniques can prevent many thread-related problems.

Basic Sewing Operations
Learn to operate your Singer Touch and Sew machine with ease‚ starting with fabric selection‚ thread setup‚ and basic stitch functions for straight and zigzag sewing.
Starting Your First Project
Begin by selecting a simple fabric like cotton or linen and ensure the machine is properly threaded. Place the fabric under the presser foot‚ lower it gently‚ and start sewing at a steady pace. Always keep fingers away from the needle and moving parts. For straight stitches‚ use the basic stitch pattern‚ and adjust the stitch length as needed. Practice on scrap fabric before working on your actual project to ensure smooth operation and even stitching. Refer to the manual for guidance on selecting the right needle and thread for your fabric type. This will help you achieve professional results from the very first stitch.
Selecting the Right Fabric
The Singer Touch and Sew manual recommends using high-quality fabrics suitable for your project. Cotton‚ linen‚ silk‚ and wool are ideal for most sewing tasks; Always choose fabrics that match your thread and needle type for optimal results. For delicate fabrics‚ use a sharp needle to prevent tears‚ while heavy fabrics may require a heavier-duty needle. Pre-wash and dry your fabric before sewing to ensure proper fit and avoid shrinkage. Refer to the manual for specific fabric recommendations and needle guidance to achieve the best outcomes for your projects. Proper fabric selection ensures smooth stitching and professional-looking results every time.
Using the Stitch Pattern Dial
The Singer Touch and Sew manual highlights the Stitch Pattern Dial as a key feature for customizing your sewing experience. This dial allows you to select from various stitch patterns‚ including straight stitch‚ zig-zag‚ and decorative options. To use it‚ simply rotate the dial to your desired stitch type. The machine will automatically adjust to the selected pattern‚ ensuring consistent stitching. For further customization‚ you can manually adjust stitch length‚ width‚ or needle position using the control buttons. Always refer to the manual for specific guidance on selecting and adjusting stitches for different fabrics and projects. This feature provides versatility and precision‚ making it easy to achieve professional-looking results for both basic and creative sewing tasks.

Advanced Features of the Singer Touch and Sew
The Singer Touch and Sew manual reveals advanced features like customizable stitch patterns‚ adjustable lengths‚ and widths‚ plus a bobbin push button for seamless project transitions.
The Stitch Pattern Dial Explained
The Singer Touch and Sew manual highlights the Stitch Pattern Dial as a key feature‚ allowing users to select from various stitch options‚ including straight‚ zig-zag‚ and decorative patterns. This dial simplifies the process of choosing the right stitch for different fabrics and projects‚ ensuring versatility and precision. With a mere turn of the dial‚ users can switch between practical and creative stitching‚ making it ideal for both beginners and experienced sewists. The manual emphasizes how this feature enhances sewing efficiency and customization‚ catering to a wide range of sewing needs and projects.
Adjusting Stitch Length and Width
The Singer Touch and Sew manual provides clear instructions for adjusting stitch length and width‚ allowing users to customize their sewing projects. By using the manual adjustment buttons‚ sewists can modify these settings to suit various fabrics and stitching needs. The manual emphasizes the importance of proper needle selection and fabric type for optimal results. It also outlines how to achieve consistent stitching by ensuring the presser foot is lowered and the fabric is guided smoothly. These adjustments enable precise control over stitch formation‚ making the Singer Touch and Sew machine versatile for both delicate and heavy-duty sewing tasks. This feature is particularly useful for tailoring and home decor projects‚ where stitch customization is essential for professional-looking results.
Customizing Your Stitch Settings

The Singer Touch and Sew manual details how to customize stitch settings for personalized sewing projects. Users can explore various stitch patterns‚ from straight stitches to decorative zigzag designs‚ using the Stitch Pattern Dial. The manual guides on selecting the ideal stitch length and width for specific fabrics‚ ensuring precise results. Additionally‚ it explains how to manually adjust the needle position for straight stitching‚ offering flexibility for unique sewing needs. With these customization options‚ sewists can tailor their projects to achieve professional-quality finishes‚ whether sewing delicate fabrics or heavy-duty materials. This feature makes the Singer Touch and Sew machine ideal for both beginners and experienced crafters seeking creative control over their work.

Maintenance and Care
Regular maintenance ensures your Singer Touch and Sew machine operates smoothly. Clean the machine‚ oil moving parts‚ and store it properly to extend its lifespan and performance.
Cleaning the Machine
Regular cleaning is essential to maintain your Singer Touch and Sew machine’s performance. Use a small‚ dry brush to remove dust and lint from the interior‚ including the bobbin area and tension discs. Avoid using liquids or harsh chemicals‚ as they can damage the machine’s finish or internal components. Gently wipe the exterior with a soft‚ dry cloth to prevent dust buildup. For stubborn debris‚ a slightly damp cloth may be used‚ but ensure no moisture enters the machine. Regular cleaning prevents thread jams and ensures smooth operation. Always unplug the machine before cleaning for safety. This routine maintenance will extend the lifespan of your Singer Touch and Sew sewing machine.
Oiling and Lubrication
Regular oiling is crucial for maintaining the smooth operation of your Singer Touch and Sew machine. Use high-quality sewing machine oil‚ applying a few drops to moving parts such as the shuttle hook and gears. Avoid over-lubricating‚ as excess oil can attract dust and cause damage. Turn the handwheel gently after oiling to ensure even distribution. Oiling should be done every 10-15 hours of use or as specified in the manual. Proper lubrication prevents friction‚ reduces wear and tear‚ and ensures consistent stitching. Always unplug the machine before oiling for safety. Refer to your Singer Touch and Sew manual for specific oiling points to keep your machine in optimal condition.
Storage and Transportation Tips
Proper storage and transportation are vital to maintain the functionality of your Singer Touch and Sew machine. When storing‚ ensure the machine is clean‚ dry‚ and covered to protect it from dust and moisture. Use the original case or a sturdy‚ padded cover for added protection. Avoid exposing the machine to direct sunlight or extreme temperatures. For transportation‚ secure the machine in an upright position to prevent damage from shocks or tilting. Remove any loose accessories and store them separately. Always handle the machine with care‚ as rough movements can cause internal damage. Follow these guidelines to ensure your Singer Touch and Sew machine remains in excellent condition for years to come. Regular maintenance and proper storage will extend its lifespan and performance quality.

Troubleshooting Common Issues
This section helps users identify and resolve common problems with their Singer Touch and Sew machine‚ ensuring smooth operation and minimizing downtime for seamstresses.
Diagnosing Thread Breakage
Thread breakage can occur due to improper threading‚ using low-quality thread‚ or incorrect needle size. Check the spool for tangles and ensure the needle is compatible with the fabric. Verify that the thread path is clear and the tension is balanced. If issues persist‚ consult the Singer Touch and Sew manual for specific guidance on adjusting settings or replacing parts. Regular maintenance‚ like cleaning and oiling‚ can also prevent thread breakage by ensuring smooth machine operation.
Fixing Improper Stitch Formation
Improper stitch formation can result from incorrect tension settings‚ misaligned needles‚ or improper fabric handling. Begin by checking the upper and lower thread tensions‚ ensuring they are balanced. Verify the needle is correctly installed and suitable for the fabric type. If stitches are uneven‚ adjust the stitch length and width using the control dial. Ensure the presser foot is lowered and fabric is fed smoothly. Refer to the Singer Touch and Sew manual for specific adjustments and troubleshooting steps to achieve consistent‚ professional-looking stitches and resolve common issues effectively.
Solving Tension Problems
Tension issues can cause uneven stitches or fabric puckering. To resolve this‚ check both the upper and bobbin thread tensions‚ ensuring they are balanced. If the upper thread is too tight‚ reduce the tension by turning the dial counterclockwise. For loose thread‚ tighten by turning clockwise. Verify the bobbin thread is properly seated in its case and evenly wound. Ensure the machine is threaded correctly‚ following the manual’s guide. Avoid pulling fabric while sewing‚ as this can disrupt tension. If problems persist‚ re-thread the machine and test on a scrap fabric. Proper tension adjustment ensures smooth stitching and professional results.

Additional Resources and Support
Access digital manuals‚ Singer customer support‚ and online communities for troubleshooting‚ updates‚ and creative tips to enhance your sewing experience with Singer Touch and Sew machines.
Accessing Digital Manuals
Digital manuals for the Singer Touch and Sew series are readily available online‚ offering convenient access to instructions‚ troubleshooting guides‚ and stitch pattern details. Websites like all-guides.com provide free downloads of manuals for various models‚ including the Singer Touch and Sew 7466 and 603. These manuals are available in PDF or text formats‚ ensuring compatibility with most devices. Additionally‚ Singer’s official website and authorized retailers often host digital versions of manuals‚ making it easy to find specific guides for your machine. Accessing these resources allows users to quickly resolve issues‚ learn new techniques‚ and explore creative sewing projects with confidence. Visit trusted sources to download your manual and keep it handy for seamless sewing experiences.
Singer Customer Support
Singer offers comprehensive customer support to ensure seamless use of their Touch and Sew sewing machines. Users can access warranty information‚ terms and conditions‚ and machine updates through Singer’s official website. Additionally‚ Singer provides expert support for troubleshooting and maintenance‚ helping users resolve issues quickly. The company also offers stitch guides and detailed instructions to enhance your sewing experience. For further assistance‚ Singer recommends visiting authorized retailers or reaching out to their customer service team. Online communities and forums dedicated to Singer sewing machines also serve as valuable resources for tips and advice from experienced users. This extensive support network ensures that users can master their Singer Touch and Sew machine with confidence and creativity.
Online Communities and Forums
Online communities and forums dedicated to Singer sewing machines are invaluable resources for users of the Touch and Sew series. These platforms offer a space to share experiences‚ ask questions‚ and gain insights from experienced sewists. Many forums provide access to downloadable manuals‚ troubleshooting guides‚ and creative tips to enhance your sewing projects. Additionally‚ users can find inspiration from shared projects and learn about the latest trends in sewing. These communities are particularly helpful for resolving specific issues or exploring advanced features of the Singer Touch and Sew machines. By engaging with these forums‚ users can connect with a supportive network of sewing enthusiasts and professionals‚ ensuring they make the most of their sewing experience.
Mastering your Singer Touch and Sew machine opens doors to creative sewing projects. With proper care and practice‚ you can achieve professional results and enjoy endless stitching possibilities.
Final Tips for Mastering Your Singer Touch and Sew
Experiment with stitch patterns and fabric types to unlock your machine’s full potential. Regularly clean and oil your Singer Touch and Sew to ensure smooth operation. Always refer to the manual for guidance on advanced features like the Stitch Pattern Dial. For best results‚ use Singer-branded needles and high-quality threads. Keep the machine on a stable‚ flat surface to maintain even stitching. Practice on scrap fabric before working on final projects. Explore online resources for additional tips and creative ideas. With patience and practice‚ you’ll become proficient in using your Singer Touch and Sew‚ enabling you to tackle a wide range of sewing tasks with confidence and precision.
Encouragement to Explore Creative Sewing Projects
Embark on creative sewing projects with your Singer Touch and Sew‚ from crafting home decor to making personalized clothing. Start with simple tasks like hemming or quilting‚ then gradually move to intricate designs using the Stitch Pattern Dial and custom settings. The machine’s versatility allows for both practical and decorative stitching‚ perfect for tailoring or embroidery. Explore various fabric types and techniques to expand your skills. Join online communities or forums for inspiration and guidance. With practice‚ you can create unique‚ professional-looking pieces that reflect your personal style. Don’t hesitate to experiment—your Singer Touch and Sew is a powerful tool for bringing your sewing ideas to life and expressing your creativity freely.