Cross stitch is a timeless and versatile craft that combines creativity with relaxation. Its simplicity makes it accessible to all skill levels, while its versatility allows for endless design possibilities. Whether creating intricate patterns or simple motifs, cross stitch offers a meditative experience and a sense of accomplishment with every completed project.
What is Cross Stitch?
Cross stitch is a form of counted thread embroidery that involves creating patterns on fabric using X-shaped stitches. It is one of the simplest and most popular needlework techniques, requiring minimal supplies. The craft uses colorful threads to bring designs to life, with each stitch counted from a chart or pattern. Cross stitch is versatile, allowing crafters to create decorative items, personalized gifts, and intricate artwork. Its accessibility and creative possibilities make it a beloved hobby for makers of all skill levels, from beginners to experienced embroiderers.
A Brief History of Cross Stitch
Cross stitch has ancient roots, with evidence of its use dating back to early civilizations in Egypt, China, and the Middle East. It evolved over centuries, becoming a popular form of embroidery in medieval Europe. The craft was often used to embellish clothing and home textiles, with intricate designs passed down through generations. In the Renaissance, cross stitch became more widespread, particularly among the upper class. Its accessibility and simplicity made it a favorite across cultures, with traditional folk art in Scandinavia, Russia, and the Middle East showcasing its enduring appeal. Today, cross stitch remains a cherished craft, bridging past and present.
Why Cross Stitch is Popular Today
Cross stitch has seen a resurgence in popularity as a calming, creative outlet in today’s fast-paced world. Its accessibility and versatility appeal to crafters of all skill levels, making it a beloved hobby. The satisfaction of creating something handmade, combined with its portability and therapeutic benefits, draws many to this timeless craft. It also fosters a sense of community, with enthusiasts sharing patterns and tips online. Cross stitch’s enduring charm lies in its ability to blend tradition with modern creativity, offering a digital detox and a fulfilling pastime.

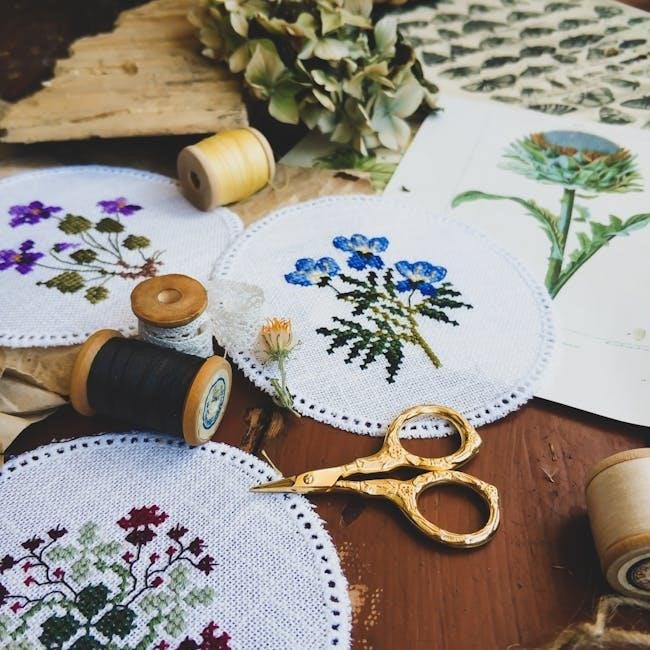
Materials Needed for Cross Stitch
Embroidery fabric, threads, needles, scissors, and patterns are essential. Aida and Evenweave fabrics are popular. Use tapestry needles and embroidery hoops for ease. Choose floss for vibrant stitching.
Essential Supplies for Beginners
Beginners should start with a cross stitch kit, which often includes pre-printed fabric, threads, and a needle. Aida cloth is ideal for its clear weave. Use a tapestry needle for ease and an embroidery hoop to keep fabric taut. DMC or Anchor threads are popular for vibrant stitching. Good-quality scissors and a small magnifier can aid visibility. Patterns designed for beginners are perfect for practice. Always keep extra thread and a needle threader handy. Having these basics ensures a smooth start to your stitching journey.
Understanding Fabric Types
Cross stitch fabrics vary in type and weave, with Aida cloth and evenweave linen being the most popular. Aida cloth is soft and has a clear, even weave, making it ideal for beginners. Evenweave linen offers a more traditional stitching experience but is slightly stiffer. Fabric count refers to threads per inch; higher counts mean finer stitching. Always choose fabric that suits your project’s complexity. Pre-wash and iron fabric before stitching to ensure proper tension and prevent distortion during stitching.
Thread and Needle Selection
Choosing the right thread and needle is essential for cross stitch success. Embroidery floss, like DMC or Anchor, is the most common thread type, offering vibrant colors and soft texture. Stranded cotton is another popular option, known for its durability and rich hues. Use a tapestry needle with a large eye for easy threading, or a sharp sewing needle for tighter fabric weaves. Pairing the right thread and needle ensures smooth stitching and prevents thread damage, enhancing your overall stitching experience and project quality.
Basic Cross Stitch Techniques
Cross stitch techniques include full cross, half, and quarter stitches. These stitches create patterns on fabric, with full cross being the most common. Backstitch is used for outlines, adding definition to designs. Mastering these techniques provides a solid foundation for any project, allowing crafters to explore intricate designs with confidence.
The Full Cross Stitch
The full cross stitch is the fundamental stitch in cross stitching. It involves creating an “X” by crossing two diagonal lines on the fabric. To execute it, bring the needle up at the bottom left of the stitch, insert it diagonally to the top right, then bring it back up on the bottom right and insert diagonally to the top left. This creates a complete “X” shape, forming the basis of most designs. Proper tension ensures the stitch lies flat, maintaining the fabric’s integrity and the design’s clarity. Consistency in stitch size and direction is key for a professional finish. This stitch is versatile and essential for both beginners and experienced crafters, allowing for a wide range of creative possibilities. By mastering the full cross stitch, crafters can confidently tackle various patterns and projects, from simple to complex, while enjoying the therapeutic benefits of this traditional craft. The full cross stitch is not only foundational but also a cornerstone of cross stitch artistry, enabling the creation of beautiful and intricate designs that last for generations.
Half Stitches and Quarter Stitches
Half stitches and quarter stitches are essential for adding detail and texture to your cross stitch projects. A half stitch is a single diagonal line, typically used for shading or outlining, while a quarter stitch is a smaller mark that adds fine details. Both stitches are stitched in one direction, unlike the full cross stitch. They are particularly useful for creating curves and subtle variations in color. While they can be a bit challenging for beginners, mastering them enhances the dimensionality of your work. Proper alignment and tension are crucial for clean results.
Backstitch for Outlines
Backstitch is a straight line stitch used to create sharp, clean outlines and detailed designs in cross stitch. Unlike the cross stitch, it consists of straight stitches worked in a continuous line, making it ideal for text, borders, and intricate patterns. To backstitch, bring your needle up at the starting point, insert it one stitch length away, and continue in a straight line. This stitch adds clarity and definition to your work, making it especially useful for small details. While it may feel awkward at first, it becomes a valuable skill for enhancing your projects.
Reading a Cross Stitch Pattern
Reading a cross stitch pattern involves interpreting symbols and colors to create your design. Accurately counting threads ensures precise stitching and proper alignment always.
Understanding Symbols and Colors
In cross stitch, symbols and colors are essential for accurately interpreting patterns. Each symbol represents a specific thread color or stitch type, while the corresponding legend provides clarity. Colors are typically indicated by a key or chart, ensuring precise thread selection. Beginners should always reference the pattern’s legend to match symbols correctly. Properly understanding these elements ensures your design aligns with the intended artwork. Highlighting completed areas can help track progress and maintain accuracy while stitching. This step is crucial for achieving a professional finish in your projects.
Counting Threads and Managing Mistakes
Accurate thread counting is vital in cross stitch to ensure patterns align correctly. Use the fabric grid or symbols to guide your stitches. If mistakes occur, gently rip out stitches without pulling too hard to avoid fabric damage. Keeping scissors handy to cut threads as you go prevents tangles. Using a needle threader can help manage thread ends. Patience is key—mistakes are part of the learning process. Work in small sections and highlight completed areas to maintain clarity. Consistency ensures a polished finish, so take your time and stay organized while stitching.

Stitching Tips for Beginners
Start with simple patterns, use good lighting, and keep fabric taut. Maintain even tension to avoid puckering. Store threads neatly to prevent tangles. Practice on scrap fabric first to build confidence. Keep scissors and a needle threader handy. Don’t pull threads too tight, as this can distort stitches. Celebrate small progress and enjoy the meditative process of creating something beautiful step by step;
Starting Your First Project
Choose a simple pattern designed for beginners, such as a small design with minimal colors. Gather all materials beforehand to ensure a smooth start. Find the center of your fabric by folding it in half both ways, and mark it with a pin. Begin stitching from the center outward to maintain balance. Use a hoop or frame to keep fabric taut, and work in a well-lit area. Start with the most prominent color or the largest section to build confidence. Keep threads organized and trim excess as you go. Take breaks to avoid fatigue and enjoy the process of creating something beautiful.
Maintaining Tension and Neatness
Maintaining consistent tension is key to achieving a neat and professional finish. Avoid pulling the thread too tightly, as this can distort the fabric or cause puckering. Use a hoop or frame to keep the fabric taut but not overly tight. Keep your stitches evenly spaced and avoid overlapping threads. Use thread conditioner to reduce frizz and tangling, ensuring smooth stitching. Always stitch in the same direction to maintain uniformity. Regularly trim excess thread close to the fabric to prevent it from getting in the way. Taking breaks can help prevent mistakes and keep your work neat.

Common Mistakes and Solutions
- Thread issues: Use thread conditioner and cut as you go to prevent tangling.
- Misaligned stitches: Count threads regularly to ensure accuracy and straight lines.
- Uneven tension: Use a hoop and maintain consistent stitching to avoid fabric distortion.
Troubleshooting Thread Issues
Thread issues are common but easily fixable. Tangling can be minimized by cutting threads as you go and using thread conditioner. To prevent knots, avoid pulling the needle too tightly. If threads fray, trim them carefully to maintain even stitching. Using the right number of strands, as indicated in your pattern, ensures consistency. Regularly winding threads on a bobbin or card keeps them organized and tangle-free. These simple steps help maintain smooth stitching and a professional finish.
Fixing Misaligned Stitches
Misaligned stitches can be corrected by carefully counting threads and ensuring proper fabric tension. Start by identifying the error and gently removing the misplaced stitches. Use a needle to guide the thread back to its correct position, following the pattern. To prevent future misalignment, mark the center of your fabric and pattern, and maintain consistent stitching direction. Regularly checking your work and using a hoop or frame to keep fabric taut can help avoid such issues altogether.